
This page shows a live track of where i’m riding, if I’m not riding it shows the last days route and date.
Give the track a few seconds to display on the map!

Lambretta pictures . Lambretta parts sales . Lambretta tuning tips, tools and service
This page shows a live track of where i’m riding, if I’m not riding it shows the last days route and date.
Give the track a few seconds to display on the map!

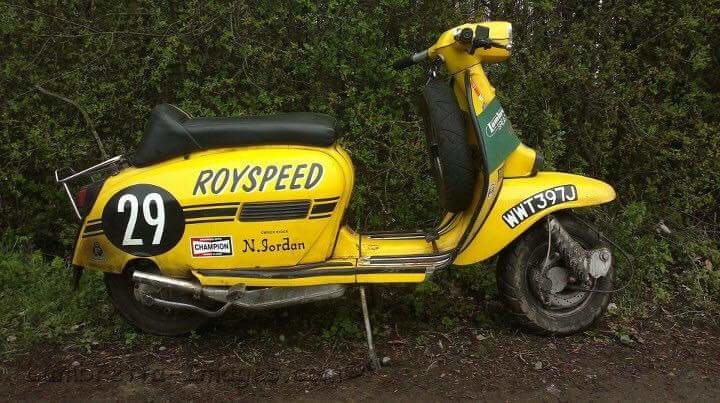
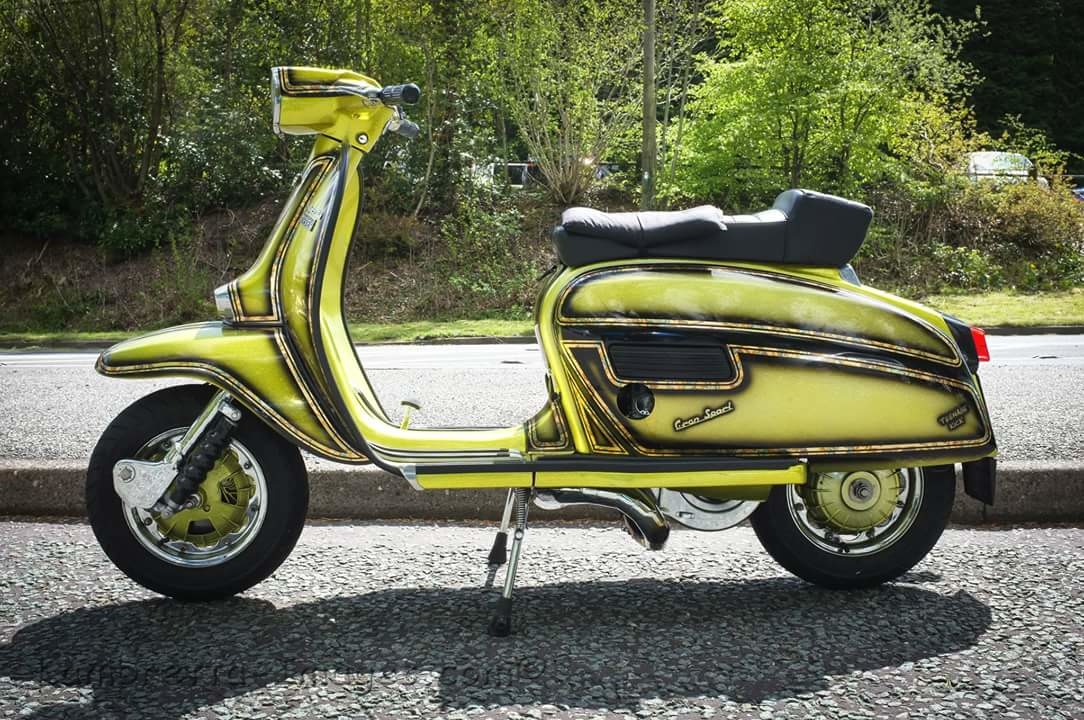
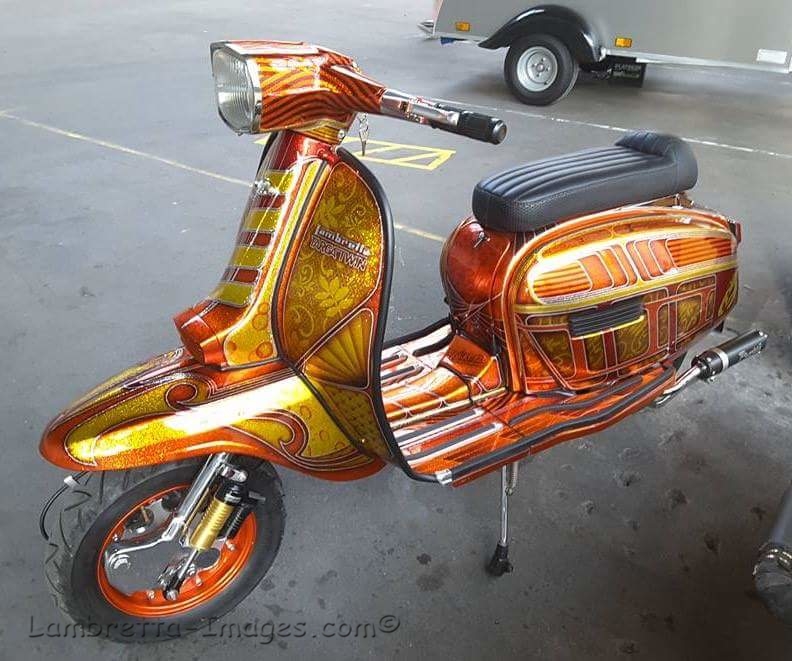
Below is a photo gallery of Lambrettas owned by ILC members, all members own more than one, so the number of photos doesn’t represent the number of ILC members!


A full price breakdown of each option above is available on requests.
The engine is also available in kit form, the parts listed below form just the essential parts needed, all other “standard” engine parts are also required.
Casing, side casing, mag housing & cover, crank, Cylinder kit, Head, seal plates, stator plate, gearbox end plate, Manifold, VHSB34 carb, reed chamber, reed valve, Primary drive set, Chain, Tensioner, Wiring loom, Mounting bracket set, studs/bearings/seals/gaskets
Radiator cowling, water pump, mounting kit, Expansion & battery tray
RS125 ECU, rectifier, Coil, Flywheel, Stator & pickup, Radiator, Expansion bottle, Clocks, Battery, BGM Pro clutch centre, gearbox, Exhaust, Rear axle, Side case/gear selector/ rear brake furniture.
[cresta-facebook-messenger text=”get in touch!” icon=”yes” position=”top”]

Over the years we have done countless miles attending various rallys around the UK and Europe, each year we also try to do at least one long tour. The tours are usually taking a long route to where ever the annual Lambretta jamboree is taking place, but not always, now and again we pick a place and just ride there. personally I also do many miles each year clocking up miles testing, or rather trying to break, various products which are in development.
This section of the website is where the images, video’s and experiences of these adventures are shared, I have lots of adventures to add from previous years and will endeavour to update this section with upcoming adventures as and when time allows. If you subscribe you will be notified when new content is added to the website.
to this site for notification of future updates.

£205.00
Polished Lambretta chain case cover
Out of stock
| Weight | 2 kg |
|---|---|
| Dimensions | 50 × 20 × 10 cm |
Only logged in customers who have purchased this product may leave a review.
This is a full ignition system solution for Lambretta scooters. It provides answers to all the electrical problems associated with Lambretta ignitions. There is no other system on the market that covers all the technical benefits that are offered by this solution.
Please read the manual below to select your specification and build options.
NOTE: The Ebay parts prices in the manual are out of date.


The Gran Turismo ignition system is a conversion of existing electronics and components from Aprilia RS125 (122 variant) motorbikes. In developing this ignition we have provided many technical benefits that have not been available to the Lambretta owner;
these include the following:
1. A genuine 180 watt 12VDC system.
2. A wiring new loom that can handle the power.
3. External pick-up.
4. Digital timing with auto advance and retard.
5. “Plug and play” power valve control “Rave” unit.
6. Easily adjustable ignition timing.
7. Integrated rev counter,
8. Integrated low fuel warning,
9. Digital clock.
10. Integrated volt meter.
11. Integrated lap counter.
12. Integrated water temp.
13. Options for water and air cooled engines.
14. Full, explanatory build manual and dimensioned drawings.
15. Extensive DIY options .


£25.00
Stainless steel electronic mounting kit for all series 3 Lambretta. Made in Birmingham, England.
Out of stock
This mounting kit is a very neat solution. Utilising full stainless construction and captive fasteners, this kit is very easy to mount and has perfect frame and body work clearances.
| Weight | 0.225 kg |
|---|---|
| Dimensions | 13 × 7 × 4 cm |
There are no reviews yet.
Only logged in customers who have purchased this product may leave a review.


£30.00
The Gran Turismo chain tensioner is designed and manufactured to resolve many of the technical issues associated with existing Lambretta products. The tensioner is designed to have the correct fit to the engine casing and be able to accommodate a wide range primary drive combinations.
Available on back-order
The design of the tensioner assembly was specifically targeted to resolve technical issues such as:
1. Wide range of primary drive combinations
2. High quality UK manufacture
3. Replaceable wear components
4. Push / pull tensioning
5. Precise fit to engine casing
6. Lowest price universal tensioner available
To fully resolve all of these technical problems properly required the entire assembly to be re-considered from scratch. Every component was re evaluated from a new design and performance criteria.
1pcs Tensioner mounting plate, CNC machined aluminium
1pcs Tensioner wear shoe, injection moulded plastic
2pcs Custom machined shoe dowel fasteners
2pcs Hex, M6 bolts x long
2pcs Counter sunk, M6 socket heads x long
The installation of this product will provide you with increased flexibility in primary drive selection. Please view the selection table below for recommended ratios, sizes and fitting positions.
Primary combination Chain length
15/46 80
16/46 81
17/46 81
18/46 82
19/46 82
15/47 81
16/47 81
17/47 82
18/47 82
19/47 83
Kit contains the following parts:
1pcs Tensioner mounting plate
1pcs Tensioner wear shoe
2pcs Custom machine shoe dowels
2pcs M6 hex bolts
2pcs M6 counter sunk socket heads
In addition to the kit you will need:
1. Good tools
2. The correct length IWIS chain
3. A chain tension tab washer
Warning! Only use chains with riveted joining links (we recommend IWIS chain). Never use chains with loose or pinned joining links.
Assembly steps:
With the original chain and primary drive removed, re-assemble with the new chain tension
1. Loosely assemble the chain tensioner together so that the shoe is allowed to slide up and down.
2. Check and prepare the 2 M6 tensioner fixing holes in the casing. Use a drop of soft locking compound to prevent socket screws loosening.
3. Offer up and screw down the assembled tensioner assembly.
4. Fit the lay shaft primary drive shims where applicable.
5. Make sure the shoe is correctly positioned for your primary combination
6. Offer up and fit the primary drive and chain assembly.
7. Move the shoe to the correct tensioning position and tighten the M6 hex nuts
8. Torque range 2 .5 – 3.3 ft/lbs (30-40inch/lbs). These settings require a low range ¼” torque wrench.
9. The shoe dowel is designed to bite into the mounting plate and hold the wear shoe firm.
10. Turn the engine over a few times to check fit and clearance
11. Secure M6 hex nuts with the tab washer (not supplied) listed below.
12. The M6 counter sunk screws can have increased security by dot punching a small spot between the edge of the fastener and the mounting plate (the same technique used for securing drive side seal plates).
The tensioner needs no special care or maintenance procedures. Spare parts are available. Ensure you have the correct type and quantity of oil before running your engine. Do not over tighten your chain tensioner.
While every effort has been made to ensure that these instructions are accurate and concise, they are only intended as a guide for general fitting. Your machine may differ slightly from the one described and illustrated.
Granturismo accept no responsibility for any damage or injury caused by the fitting or use of a Granturismo equipment. For additional information please consult the Lambretta workshop manual or your dealer. If you feel that
you are insufficiently equipped to carry out the installation safely and correctly, we recommend you consult your nearest dealer before proceeding.
This conversion kit carries no type approvals. Verifying the legality of the installation for road use is solely the responsibility of the customer/rider
| Weight | 0.017 kg |
|---|---|
| Dimensions | 16 × 9 × 5 cm |
There are no reviews yet.
Only logged in customers who have purchased this product may leave a review.


The Gran Turismo chain tensioner is designed and manufactured to resolve many of the technical issues associated with existing Lambretta products. The tensioner is designed to have the correct fit to the engine casing and be able to accommodate a wide range primary drive combinations.
The design of the tensioner assembly was specifically targeted to resolve technical issues such as:
1. Wide range of primary drive combinations
2. High quality UK manufacture
3. Replaceable wear components
4. Push / pull tensioning
5. Precise fit to engine casing
6. Lowest price universal tensioner available
To fully resolve all of these technical problems properly required the entire assembly to be re-considered from scratch. Every component was re evaluated from a new design and performance criteria.

1pcs Tensioner mounting plate, CNC machined aluminium
1pcs Tensioner wear shoe, injection moulded plastic
2pcs Custom machined shoe dowel fasteners
2pcs Hex, M6 bolts x long
2pcs Counter sunk, M6 socket heads x long
The installation of this product will provide you with increased flexibility in primary drive selection. Please view the selection table below for recommended ratios, sizes and fitting positions.
Primary combination Chain length
15/46 80
16/46 81
17/46 81
18/46 82
19/46 82
15/47 81
16/47 81
17/47 82
18/47 82
19/47 83
Kit contains the following parts:
1pcs Tensioner mounting plate
1pcs Tensioner wear shoe
2pcs Custom machine shoe dowels
2pcs M6 hex bolts
2pcs M6 counter sunk socket heads
In addition to the kit you will need:
1. Good tools
2. The correct length IWIS chain
3. A chain tension tab washer
Warning! Only use chains with riveted joining links (we recommend IWIS chain). Never use chains with loose or pinned joining links.
Assembly steps:
With the original chain and primary drive removed, re-assemble with the new chain tension
1. Loosely assemble the chain tensioner together so that the shoe is allowed to slide up and down.
2. Check and prepare the 2 M6 tensioner fixing holes in the casing. Use a drop of soft locking compound to prevent socket screws loosening.
3. Offer up and screw down the assembled tensioner assembly.
4. Fit the lay shaft primary drive shims where applicable.
5. Make sure the shoe is correctly positioned for your primary combination
6. Offer up and fit the primary drive and chain assembly.
7. Move the shoe to the correct tensioning position and tighten the M6 hex nuts
8. Torque range 2 .5 – 3.3 ft/lbs (30-40inch/lbs). These settings require a low range ¼” torque wrench.
9. The shoe dowel is designed to bite into the mounting plate and hold the wear shoe firm.
10. Turn the engine over a few times to check fit and clearance
11. Secure M6 hex nuts with the tab washer (not supplied)
12. The M6 counter sunk screws can have increased security by dot punching a small spot between the edge of the fastener and the mounting plate (the same technique used for securing drive side seal plates).
The tensioner needs no special care or maintenance procedures. Spare parts are available. Ensure you have the correct type and quantity of oil before running your engine. Do not over tighten your chain tensioner.
While every effort has been made to ensure that these instructions are accurate and concise, they are only intended as a guide for general fitting. Your machine may differ slightly from the one described and illustrated.
Granturismo accept no responsibility for any damage or injury caused by the fitting or use of a Granturismo equipment. For additional information please consult the Lambretta workshop manual or your dealer. If you feel that
you are insufficiently equipped to carry out the installation safely and correctly, we recommend you consult your nearest dealer before proceeding.
This conversion kit carries no type approvals. Verifying the legality of the installation for road use is solely the responsibility of the customer/rider

£7.50
Strong spring for updating standard type clutch setups.
In stock
The simplest way to up rate your standard Lambretta clutch without breaking the bank.
These performance clutch springs are ground to length and manufactured in Birmingham to consistent production standards. The are made from heavier gauge wire than standard with a slightly longer “Free length” and higher Nm rating than standard.
Inspect your existing clutch for wear and damage then fit as standard. The increase compressive pre-load helps increases the ability of the standard clutch to handle increased power from kitted engines.
These springs are not overly heavy, the spring weight is noticeable but you don’t need to be a weight lifter and standard levers are perfectly usable with these springs. Good for 20 BHP, which covers the vast majority of kitted scooters.
| Weight | 0.037 kg |
|---|---|
| Dimensions | 10 × 7 × 3 cm |
There are no reviews yet.
Only logged in customers who have purchased this product may leave a review.
The simplest way to up rate your standard Lambretta clutch without breaking the bank.
These performance clutch springs are ground to length and manufactured in Birmingham to consistent production standards. The are made from heavier gauge wire than standard with a slightly longer “Free length” and higher Nmm rating than standard.
Inspect your existing clutch for wear and damage then fit as standard. The increase compressive pre-load helps increases the ability of the standard clutch to handle increased power from kitted engines.
These springs are not overly heavy, the spring weight is noticable but you don’t need to be a weight lifter and standard levers are perfectly usable with these springs. Good for 20 BHP, which covers the vast majority of kitted scooters.


Reviews
There are no reviews yet.